Wall Decoration Sticking Guide
Sticking Guide for Car Decorations, Motor Stickers, and Bicycle Stickers
Sticking Guide for Laptop Stickers
Wall Decoration Sticking Guide
Tools needed for sticking: Tape-measure, ruler, pencil; a phone- or maybe a bank card or a plastic sheet wrapped, for example, in a sock. This is going to be the squeegee. If possible, ask someone to help you.
The decoration comes in three layers to you. 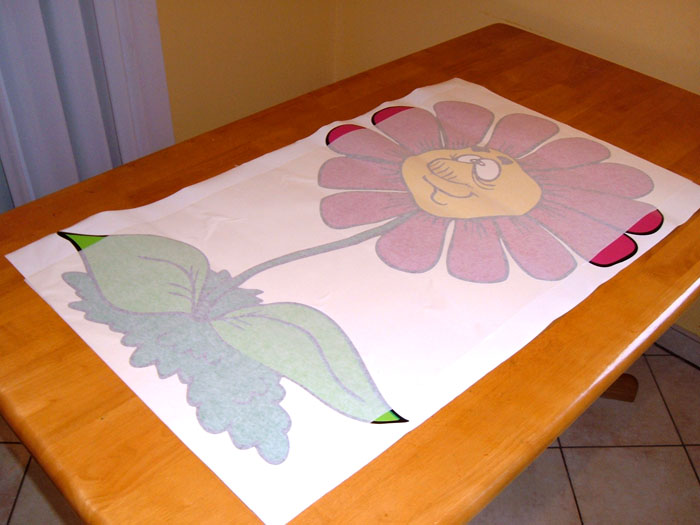 The bottom layer is the backing paper, the middle layer is the wall decoration, and the top part is the transfer foil, which helps you apply the sticker to the wall.
Step 1
Clean the surface.
Apply the sticker to dry, dust-proof and fat-free surfaces only. Dust off the wall. If you wish to apply the sticker to other surfaces (e.g. to glass, mirrors, furniture, etc.), clean the surface with the mixture of shampoo, detergent and water beforehand. It is forbidden to use window cleaner, wax and furniture polish, as it results in improper adhesion. It is allowed to use some white spirit available in the paint shop.
Step 2
Plan where to place the decoration and measure it. It is worth putting two fitting points to the transfer foil of the decoration, and two points to the wall by a lead pencil. When applying the decoration, you will join up these points.
Step 3
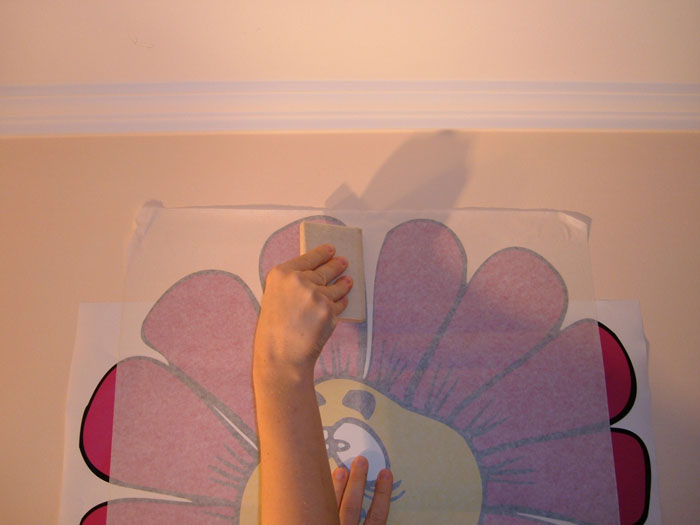
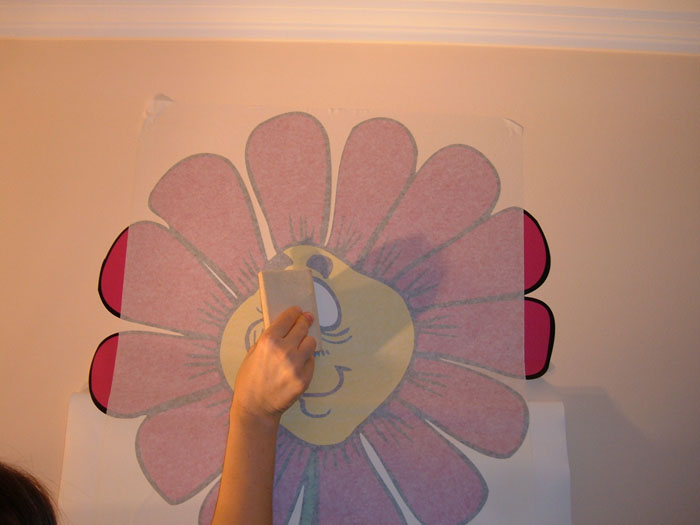
Lay the decoration on a smooth surface (e.g. table) and 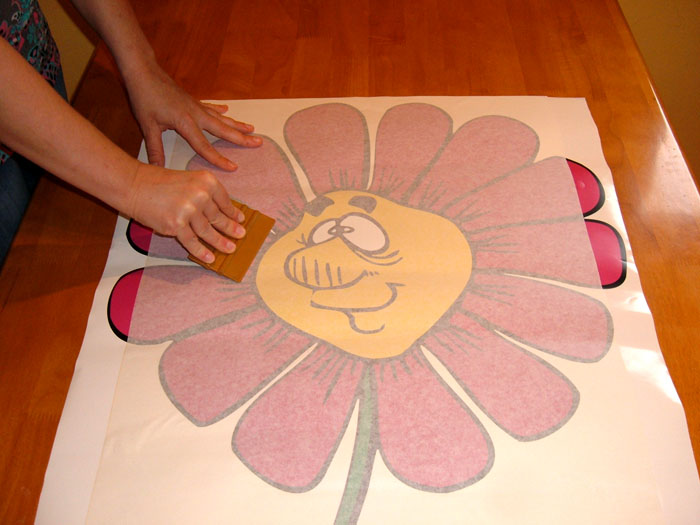 rub it over thoroughly with the squeegee.
Step 4
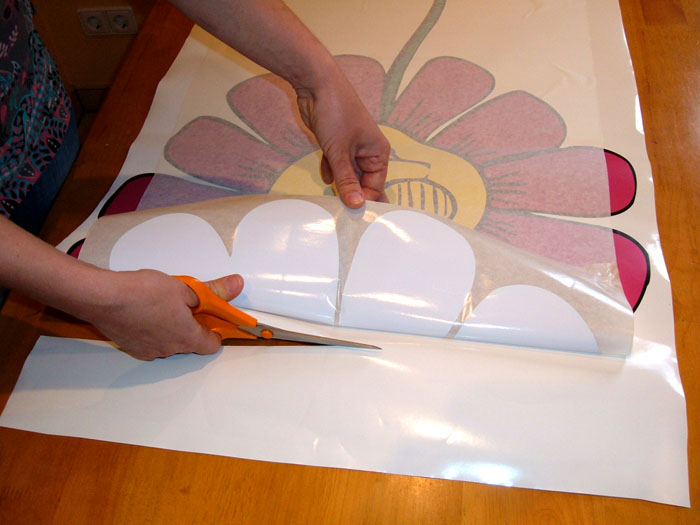
Cut a 0.5 cm line off on both sides where the transfer foil is folded back so that this part becomes separable, too.
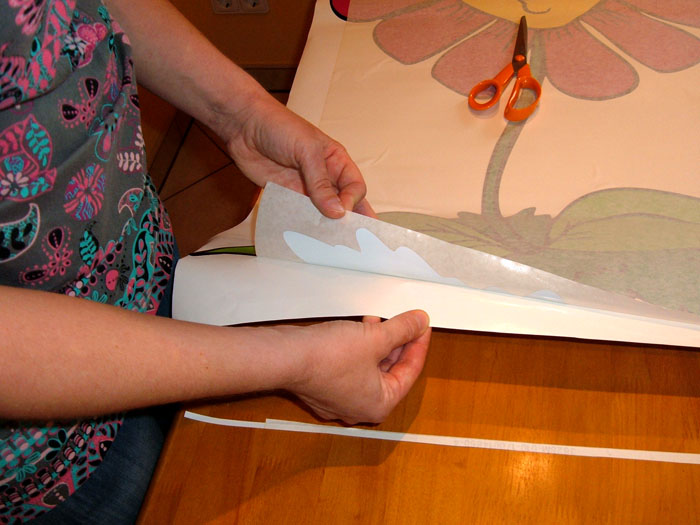

Step 5
From this point on there are two possible ways to continue.
In case of smaller surfaces, peel off the whole backing paper. If you have someone to help you, join the marked points up holding the four corners of the decoration, and apply it to the wall while stretching the decoration. Then using the squeegee (not your hands) rub it from the middle to the two sides pushing the air out.
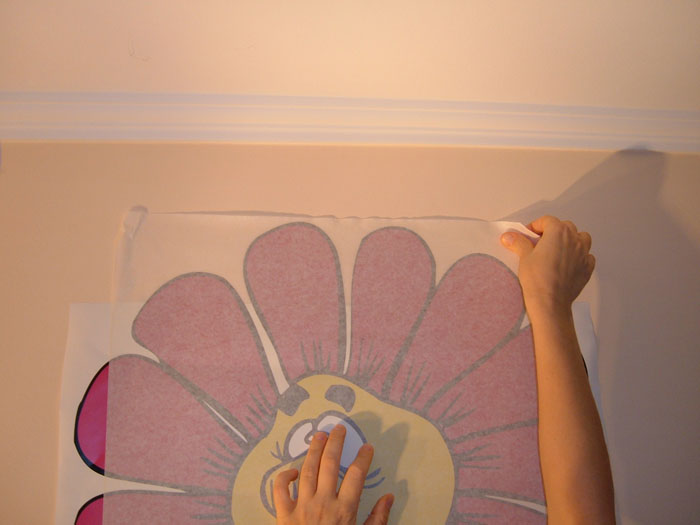
 In case of larger surfaces, separate the transfer foil and the backing paper in a 10 cm wide line, on the side where you will start the sticking and cut 10 cms only off the backing paper.
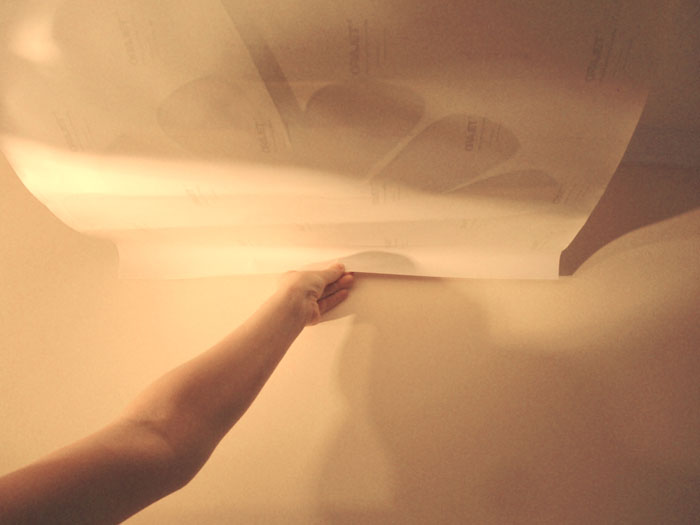
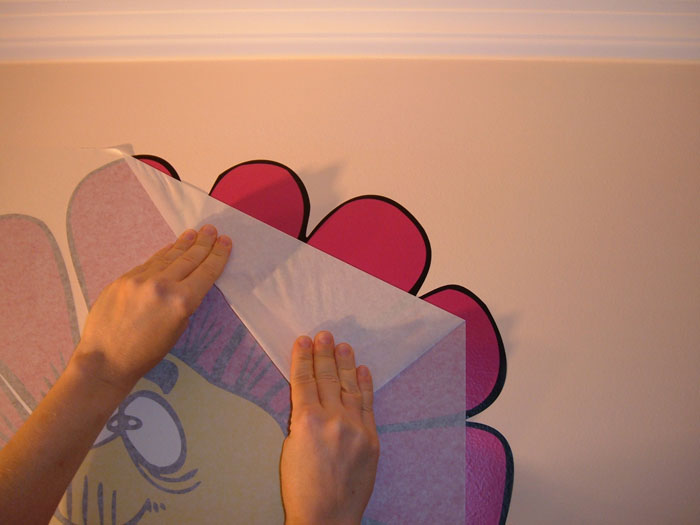
Put the decoration on the wall and join up the fitting points. Then use one of your hands to hold the decoration in place so that it does not move. With your other hand, hold one corner of the decoration tightly and stick it to the wall. Do the same with the other corner of the decoration. Using the squeegee (and not your hands) rub the part—where the backing paper has been removed from—so that it is smoothed out everywhere properly and does not crease.
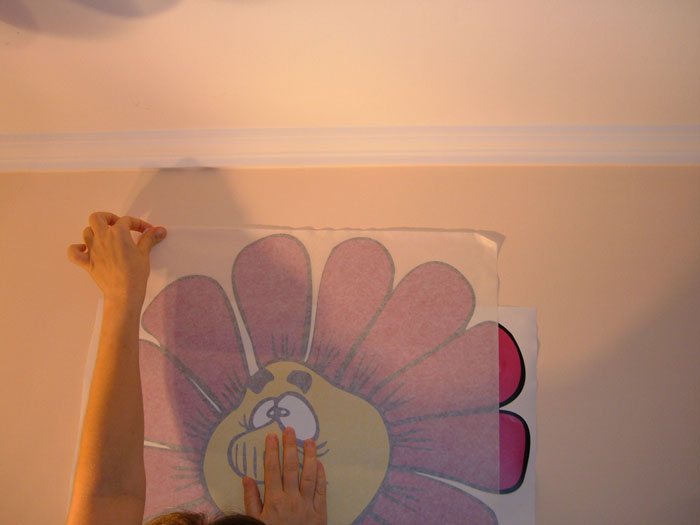
Put your hand under the decoration and pull down the backing paper a little and release the decoration. Hold the backing paper and pull it slowly while continuously using the squeegee to smooth the decoration from the middle to the two sides pushing the air out. Ensure that the decal does not stay on the backing paper. If so, re-squeegee the transfer foil and try it again.
Step 6
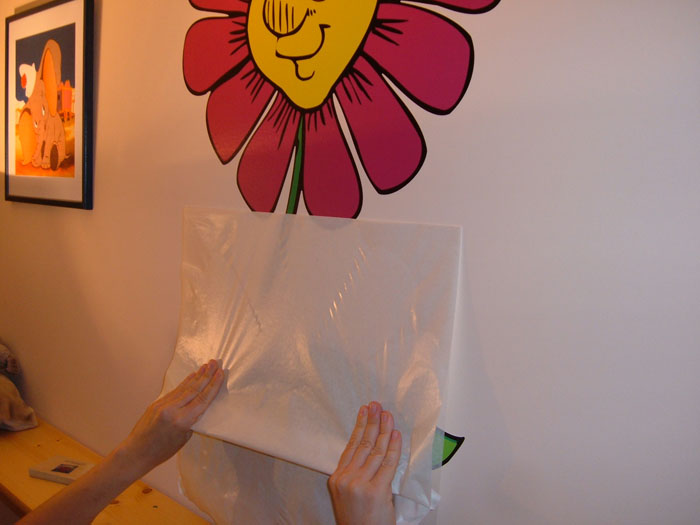
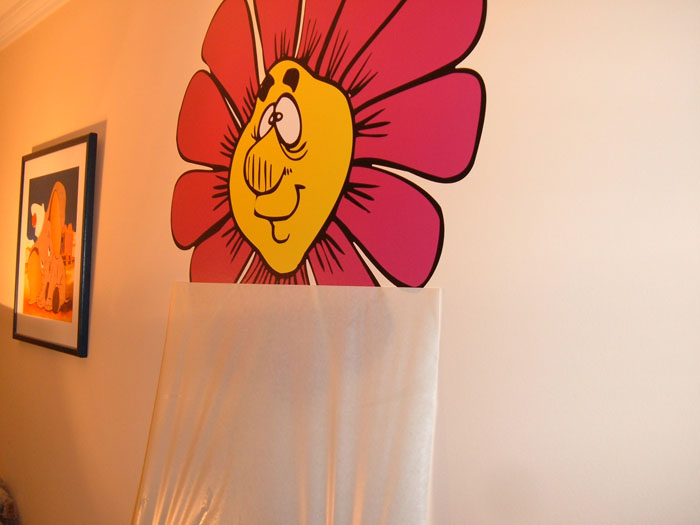
If the transfer foil is made up of more bands, peel these back slowly and one by one, laying the foil to the wall and ensuring that the sticker stays on the wall. If the sticker comes away, re-squeegee the sticker.
Step 7
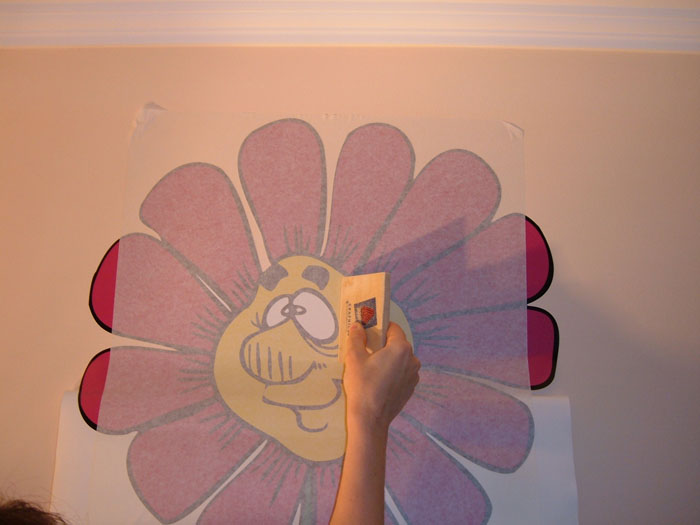
When, ready, rub over the whole decoration onc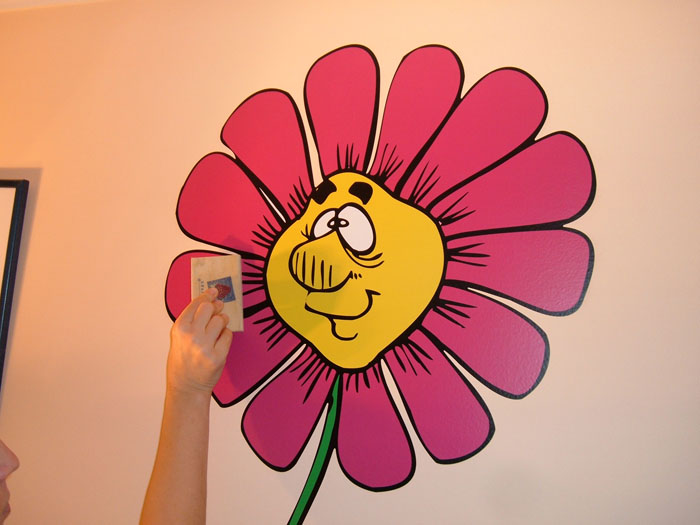 e more with the squeegee. If there is a bubble, pierce it with a needle, or if the decoration is creased, peel it back carefully and re-stick it.
Sticking Guide for Car Decorations, Motor Stickers, and Bicycle Stickers
Tools needed for sticking: tape measure, ruler, pencil; squeegee: a phone- or maybe a bank card or a plastic sheet wrapped, for example, in a sock.
Do not work with the sticker under 10°C, because the foil becomes too rigid and tears or breaks easily.
The decoration comes in three layers to you. The bottom layer is the backing paper, the middle layer is the decoration, and the top one is the transfer foil which helps you when applying the sticker.
Step 1
Clean the surface.
Apply the sticker to dry, dust-proof and fat-free surfaces only, use a mixture of shampoo, detergent and water for cleaning. It is forbidden to use window cleaner, wax and furniture polish, as it results in improper adhesion. It is allowed to use some white spirit available in the paint shop.
Step 2
Plan where to place the decoration and measure it. It is worth putting two fitting points to the transfer foil of the decoration, and two points to the wall by a lead pencil. When applying the decoration, you will paste these points.
Step 3
Lay the decoration on a smooth surface (e.g. table) and rub it over thoroughly with the squeegee.
Step 4
Cut a 0.5 cm line off where the transfer foil is folded back so that this part becomes separable from the backing paper.
Step 5
From this point on there are two possible ways to continue.
In case of smaller surfaces, peel off the whole backing paper. Join up the fitting points holding the two sides of the decoration, and apply it to the surface stretching the decoration. Then using the squeegee (do not smooth it with your hands) rub it over from the middle to the two sides pushing the air out.
--------
For easier handling in case of bigger stickers, cut off the unnecessary parts of the backing paper about 1cm from the edge of the sticker. Thus, after removing the unnecessary backing paper, it becomes easier to handle bigger size stickers.
In case of bigger surfaces, separate the transfer foil and the backing paper in a 5 cm wide band on the side where you will start sticking, then cut 5 cms off the backing paper only.
Place the decoration on the surface and join up the fitting points. Hold the decoration in place with one hand so that it does not move, and stretching one corner of the decoration stick it to the surface with the other hand. Do the same to the other corner of the decoration, too. Then, using the squeegee and not your hands), rub this part of the decoration—where the backing paper has been removed—so that it adheres nicely and does not crease anywhere.
Put your hand under the decoration and peel back a little of the backing paper, then release the decoration to the surface. Hold the backing paper and pull it slowly, while continuously smoothing the decoration from the middle to the two sides pushing the air out. Ensure that the decoration does not stick to the backing paper. If so, re-squeegee the transfer foil and try it again.
Step 6
Remove the transfer foil from the decoration, laying the foil on the surface and pulling it slowly. Ensure that the decoration sticks to the surface. If it sticks to the transfer foil, re-squeegee it.
Step 7
If there is a bubble in the decoration, pierce it with a needle, or if there is a crease, pull it up carefully and re-stick it.
Sticking Guide for Laptop Stickers
Tools needed for sticking: tape measure, ruler, pencil; squeegee: a phone- or maybe a bank card or a plastic sheet wrapped, for example, in a sock.
Step 1
Clean the surface.
Apply the sticker to dry, dust-proof and fat-free surfaces only, use a mixture of shampoo, detergent and water for cleaning. It is forbidden to use window cleaner, wax and furniture polish, as it results in improper adhesion. It is allowed to use some white spirit available in the paint shop.
Step 2
Plan where to place the decoration and measure it.
Step 3
Separate the foil and the backing paper in a 5 cm wide band on the side where you will start sticking, and cut 5 cms off the backing paper only.
Step 4
Place the decoration on the surface and join up the fitting points. Hold the decoration in place with one hand so that it does not move, and stretching one corner of the decoration stick it to the surface with the other hand. Do the same to the other corner of the decoration, too. Then, using the squeegee and not your hands), rub this part of the decoration—where the backing paper has been removed—so that it adheres nicely and does not crease anywhere.
Step 5
Put your hand under the decoration and peel back a little of the backing paper, then release the decoration to the surface. Hold the backing paper and pull it slowly, while continuously smoothing the decoration from the middle to the two sides pushing the air out.
Step 6
If there is a bubble in the decoration, pierce it with a needle.